

How To Change Brush Size In Krita
Brush Tips
Automobile Brush
The generic circle or foursquare. These castor tips are generated by Krita through certain parameters.
Types
First, there are 3 mask-types, with each the circle and square shape:
- Default
-
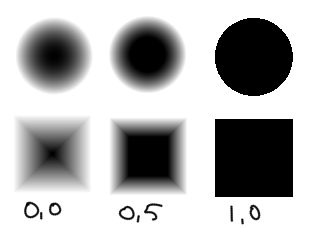
This is the ultimate generic type. The Fade parameter produces the below results. Of the three auto brushes, this is the fastest.
- Soft
-
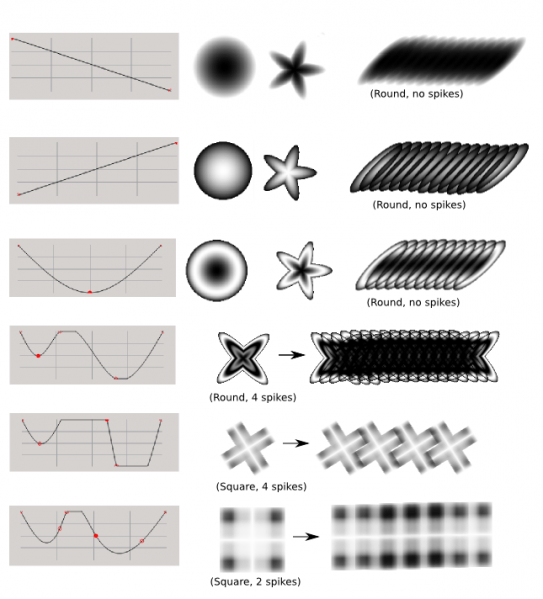
This one'due south fade is controlled past a curve!
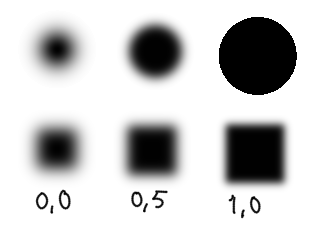
- Gaussian
-
This one uses the gaussian algorithm to determine the fade. Out of the three auto brushes, this is the slowest.
Parameters
- Diameter
-
The pixel size of the brush.
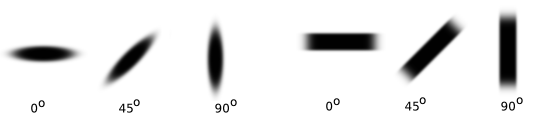
- Ratio
-
Whether the castor is elongated or non.

- Fade
-
this sets the softness of the brush. You lot tin click the chain-symbol to lock and unlock these settings. Fade has a different consequence per mask-type, and then don't be alarmed if information technology looks strange, perhaps you have the incorrect mask-type.
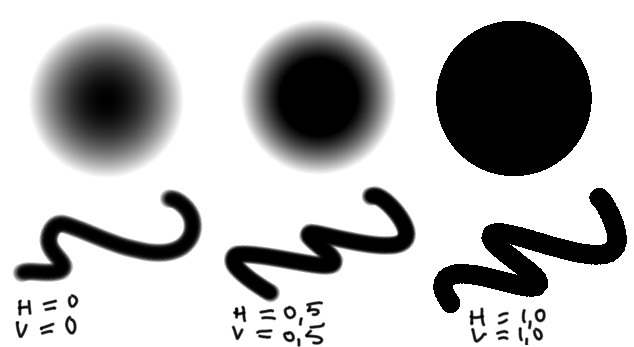
With fade locked.

With fade separately horizontal and vertical.
- Angle
-
This changes the bending a which the brush is at.
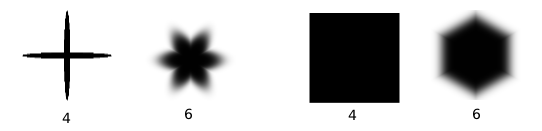
- Spikes
-
This gives the amount of tips related to the ratio.
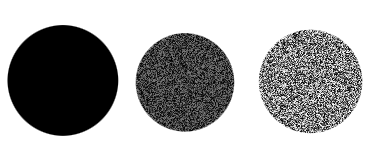
- Density
-
This determines how much area the brush-covers over its size: It makes it noisy. In the example below, the brush is gear up with density 0%, 50% and 100% respectively.

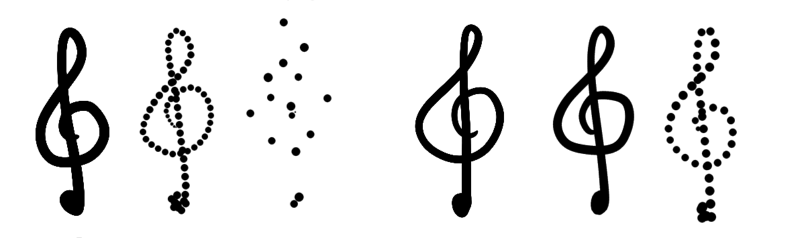
- Randomness
-
This changes the randomness of the density. In the example below, the brush is set with randomness 0%, 50% and 100% respectively.
- Spacing
-
This affects how far brushes are spaced apart. In the below picture, the iii examples on the left are with spacing 0, 1 and 5.
- Automobile (spacing)
-
Ticking this will set the brush-spacing to a different (quadratic) algorithm. The event is fine control over the spacing. In the below picture, the three examples on correct are with automobile spacing, 0, 1 and five respectively.
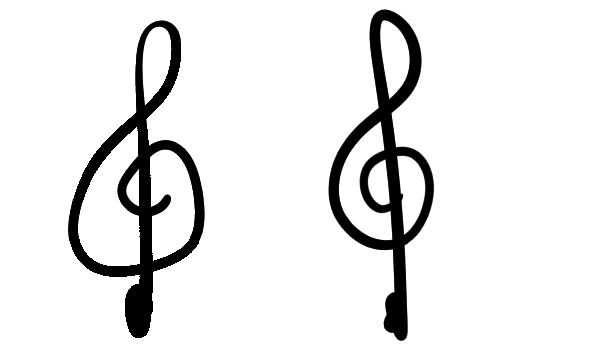
- Smooth lines
-
This toggles the super-shine anti-aliasing. In the below example, both strokes are drawn with a default brush with fade set to 0. On the left without polish lines, and the correct with. Very useful for inking brushes. This option is all-time used in combination with Auto Spacing.
- Precision
-
This changes how smooth the brush is rendered. The lower, the faster the brush, but the worse the rendering looks. You lot'd desire an inking brush to have a precision of five at all times, but a big filling castor for painting doesn't require such precision, and can be easily sped up past setting precision to 1.
- Auto (precision)
-
This allows you to ready the precision linked to the size. The outset value is the brush size at which precision is at terminal 5, and the second is the size-difference at which the precision will decrease.
For example: A brush with ''starting brush size'' 10 and ''delta'' 4, will have…
-
precision 5 at size x
-
precision 4 at size 14
-
precision 3 at size 18
-
precision 2 at size 22
-
precision 1 at sizes above 26.
-
Predefined Brushes
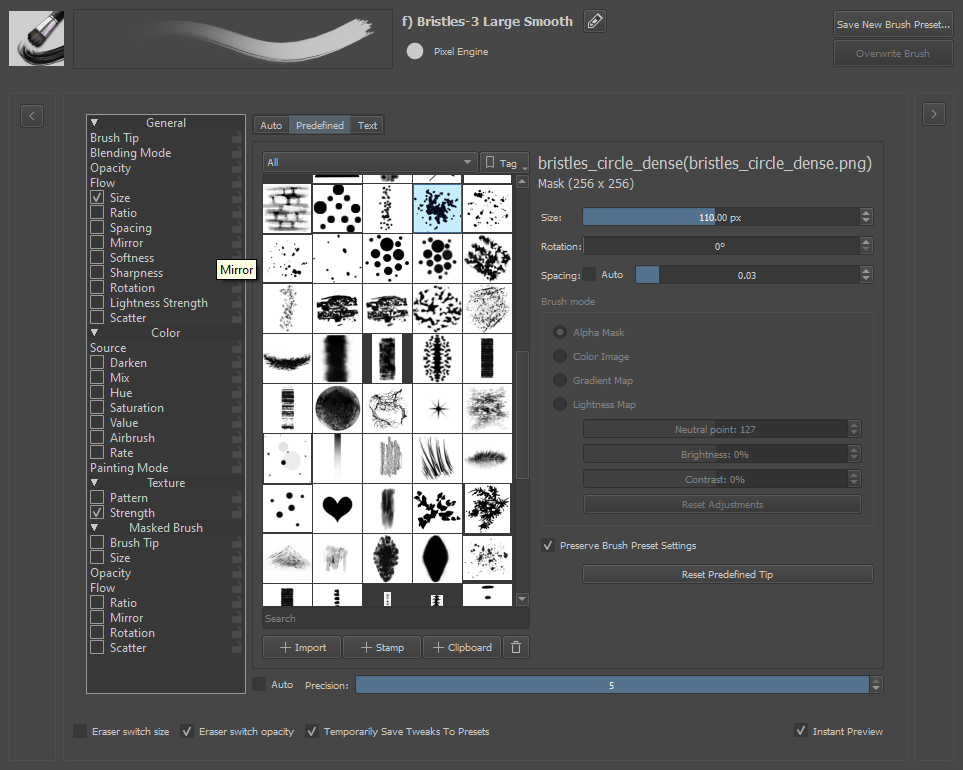
If you have used other applications like GIMP or Photoshop, you will have used this kind of castor. Krita is (generally) compatible with the brush tip definitions files of these applications:
- abr
-
Gimp autobrush tip definitions.
- *.gbr
-
Gimp unmarried bitmap brush tip. Can be black and white or colored.
- *.gih
-
Gimp Prototype Hose castor tip: contains a series of brush tips that are painted randomly or in order after each other. Can exist black and white or colored. Krita does not yet support all the parameters withal.
- abr
-
Photoshop castor tip collections. We support many of the features of these castor files, though some advanced features are not supported yet.
Notation that the definition of ABR brushes has been opposite engineered since Adobe does not make the specification public. We strongly recommend every Krita user to share brush tips in GBR and GIH format and more than complex brushes as Krita presets.
All predefined brush tips are shown in one selector. There are 4 more options that influence the initial bitmap castor tip y'all first painting with:
- Size
-
Scales the brush tip. 1.0 is the native size of the brush tip. This tin can be fairly large! When painting with variable size (for instance governed by pressure), this is the base of operations for the calculations.
- Rotation
-
Initial rotation of the brush tip.
- Spacing
-
Altitude between the brush tip impressions.
Brush Mode
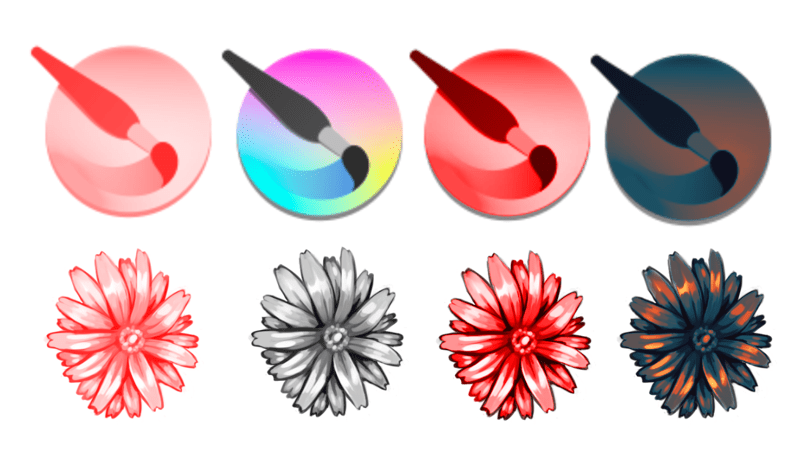
Different modes shown with different brush tips.
- Alpha Mask
-
For colored brushes, don't paint the actual colors, but brand a grayscale brush tip that will be colored by your selected foreground/background color. Lighter areas will be interpreted equally more transparent.
- Color Image
-
Use the brush tip epitome exactly as it is. Peculiarly useful for epitome stamps.
- Lightness Map
-
New in version 4.iii: Combines the features of Alpha Mask and Epitome Postage modes. Transparency is preserved as it is in Image Stamp mode, but colors or gray tones in the brush are replaced by the foreground color. The Lightness values of the castor tip image (if thinking in HSL mode) are preserved, so dark parts of the image are dark, and bright parts are bright. This allows prototype stamps where you lot can choose the color, but preserve highlights and shadows, and tin even create an result of thick paint in a brush stroke by simulating the highlights and shadows acquired by the texture of the paint and brush stroke (sometimes called an "impasto" effect).
In that location are iii sliders here, to control the verbal feel of the current brush tip in Lightness or Gradient mode:
- Neutral bespeak
-
This is the lightness level that will be the same as your current foreground color. Higher values than this will exist lighter versions of the electric current foreground color, and lower, darker versions of the current colour.
- Brightness
-
Makes the tip as a whole brighter or darker.
- Contrast
-
Increase the contrast between nighttime and light areas in the tip.
- Gradient Map
-
New in version 4.four: Utilize the lightness values of the castor tip paradigm as a map to a gradient. Black maps to the left side of the slope, and white to the right side of the gradient. The gradient used is the currently selected slope in the principal window, so y'all can change the gradient quickly and easily while painting. This mode allows image stamps with multiple colors that can exist changed (great for flowers or other colorful vegetation), and can allow paint brushes that have multiple colors. Image adjustment sliders for Lightness Map mode tin can be used for this mode too. A tutorial for this mode is here: Gradient Map Brush Tips .

How To Change Brush Size In Krita,
Source: https://docs.krita.org/en/reference_manual/brushes/brush_settings/brush_tips.html
Posted by: spinaxyll1986.blogspot.com
0 Response to "How To Change Brush Size In Krita"
Post a Comment